Circles, Ellipses and Arcs
 F5 or E
To draw a circle or ellipse, click and drag the mouse diagonally, using the same motion as when dragging a selection box. The circle will appear immediately after you release the mouse button. To draw a perfect circle, hold down the Ctrl key while you drag the mouse. Holding Shift will start drawing from the center of the shape.
The Ellipse tool also allows you to draw arcs and circle segments (or “pie wedges”). To draw an arc, grab the round handle and drag it, always keeping the mouse pointer on the inside of the (imaginary) circle.
To draw a segment (“pie wedge”), drag the round handle, always keeping the mouse pointer on the outside of the (imaginary) circle.
After the first drag, you’ll see a second round handle appear. You can set a specific angle for these shapes on the control bar, using the Start and End fields. Note that the three buttons to the right of those fields do not become activated until after you have dragged the circle handles.
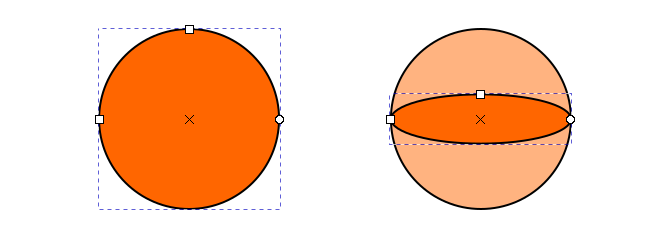
Dragging the square handles converts a circle into an ellipse.
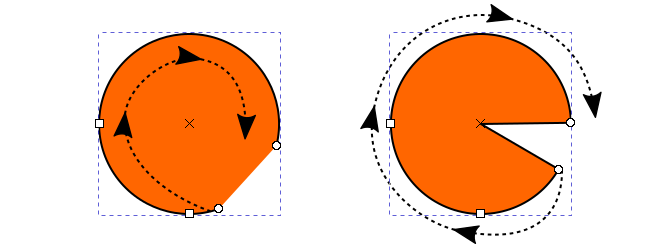
The round handles convert the shape into an arc or segment (“pie wedge”), depending on the position of the mouse (inside or outside the imaginary circle) as you drag the handle.
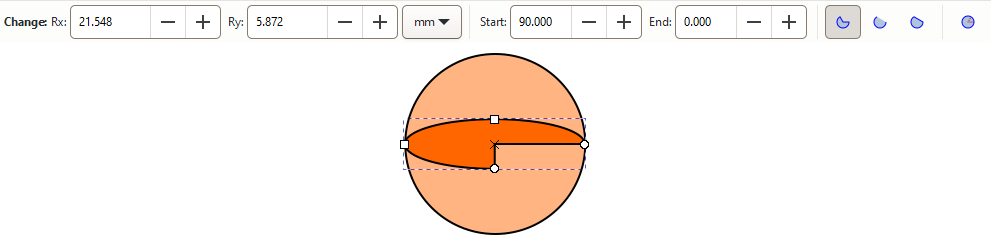
The Start and End fields, on the tool controls bar indicate the angles between which the pie or arc extends.
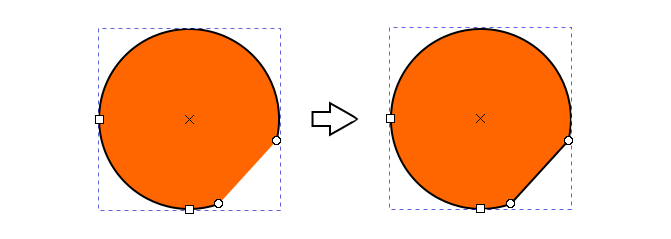
If you prefer to have a closed shape instead of an  arc, you can click on
the
arc, you can click on
the  third icon on the tool controls bar to change the ellipse.
That also works with
third icon on the tool controls bar to change the ellipse.
That also works with  segments.
To quickly restore the circle/ellipse shape, click the far right icon in the
tool controls bar:  .
.
To convert an ellipse into a perfect circle, click on one of the square handles while pressing Ctrl. The top and left square handles change the size of the ellipse in vertical and horizontal direction, respectively.
To create a circle with a specific size, you can use the fields for the horizontal and vertical radius Rx and Ry in the tool controls bar.