Creating Gradients
 Ctrl + F1 or G
Inkscape allows you to comfortably create and modify gradients on-canvas. However, it is useful to always have the Fill and Stroke dialog within reach, so you can modify the colors easily.
The Gradient Tool can be activated in the tool bar. To apply a gradient to an object, you need to first select an object. Then, click-and-drag over the object with the Gradient tool.
There will now appear two new handles on the object, one square, one circular, which are connected by a blue line. The square symbolizes the beginning of the gradient, and the circle its end.
By default, the tool creates linear gradients with two stops (i.e. 2 handles with one color each). The color of the start stop is opaque, the color of the end stop is entirely transparent. This way, your object will look as if it is fading out.
To change a gradient’s direction and position, just move the square or the circular handle with the mouse.
To edit a gradient’s colors:
select one handle of the gradient (circular or square) with the Gradient tool
in the Fill and Stroke dialog, select the color you want, or click on a color in the palette to assign it to the selected gradient stop.
To create a gradient that has more than 2 colors, you can double-click with the Gradient tool on the blue line that spans between the handles. This will create a new, diamond-shaped handle. You can now change its color. The result will immediately show on the canvas. When you move the diamond-shaped handle along the line with the mouse, the colors of the gradient will move, too.
You can transform a linear gradient into a radial one by using the top row
button  in the Fill and Stroke dialog. You can
also replace the old gradient by creating a new one with the Gradient
tool. For this, the button for radial gradients in the tool controls bar must be
selected.
in the Fill and Stroke dialog. You can
also replace the old gradient by creating a new one with the Gradient
tool. For this, the button for radial gradients in the tool controls bar must be
selected.
When an object has a radial gradient applied to it, the gradient is symbolized not by a straight line, but by an angle, that has a square handle in the middle, and two circular handles at the end of its arms. The length of the arms represents the diameter of the radial gradient.
There can be separate gradients applied to an object’s fill and to its stroke.
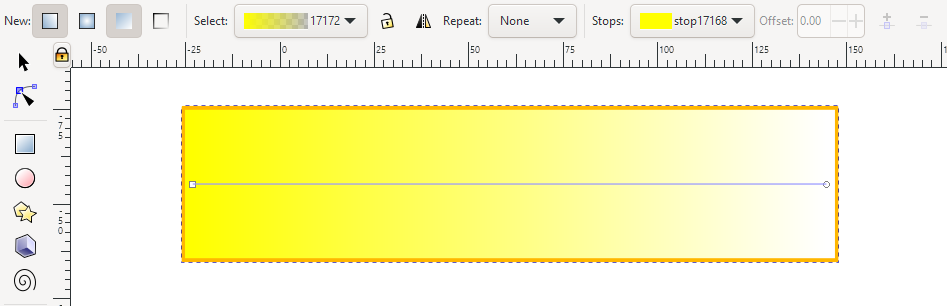
A rectangle that has a gradient going from yellow to transparent. At the top, the tool controls bar indicates that the object has a linear gradient with two stops, one yellow, the other transparent. Each stop can be modified with the Fill and Stroke dialog, after the corresponding stop has been selected on the canvas.
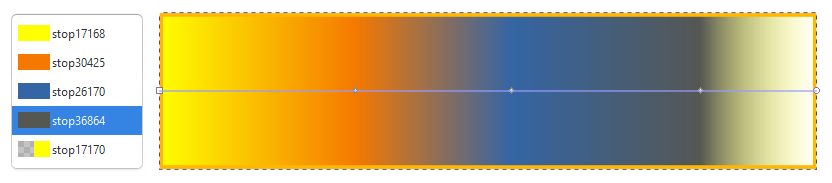
A linear gradient with 5 stops.
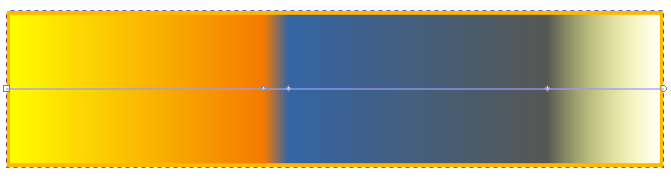
The position of each stop (color) can be changed directly on the canvas.
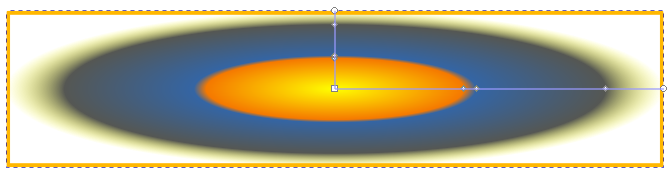
A linear gradient can be transformed into a radial gradient and the other way around.
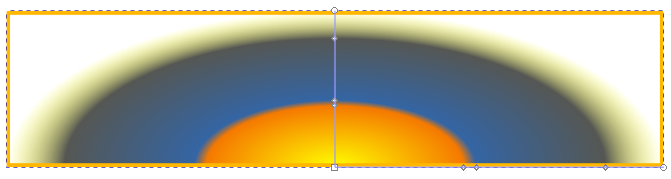
A radial gradient can be moved as a whole by dragging on the square handle.