The Pen Tool
 Shift + F6 or B
When you’re first using this tool, it may appear complex, but very soon it will become a good friend that you will enjoy to use for creating your illustrations.
This tool’s purpose is to draw paths. Multiple paths, drawn next to and on top of each other, form a design. For a start:
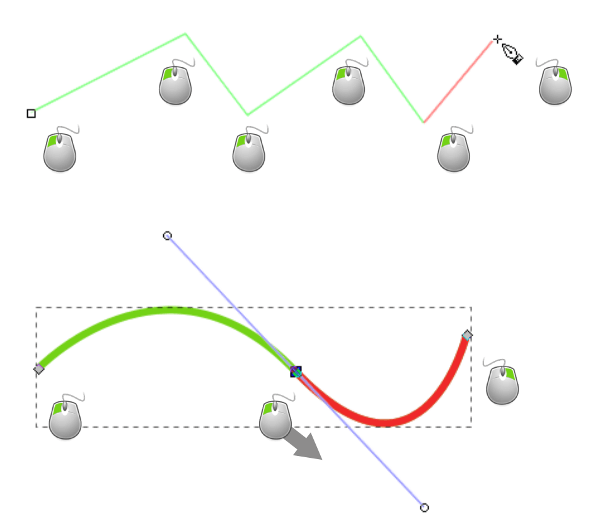
Click with the left mouse button to create the first point (node) of the path.
Move the mouse and click again. Repeat this for as many nodes that you want to draw. All your nodes will be connected by straight lines (segments).
To finish the path, right-click with the mouse.
It’s also possible to draw curves with this tool. Every node you create has two handles. These handles define the shape of the curve. To draw a curve directly, you can:
Click with the left mouse button to position the first node.
Keep the mouse button pressed and move the mouse slightly.
You are currently moving one handle of the node.
Left-click and drag to continue the path, or right-click to finish it.
The first method is predestined for creating precise drawings. First, you position the nodes, later, you can use the node tool to modify the path.
You’ll be able to choose from several modes: Bézier, Spiro, BSpline, straight lines, paraxial (= only strictly parallel and perpendicular). Then, there is the Shape option that you have already learnt about in the chapter about the Pencil tool.
With some experience, you will learn how to place your nodes strategically. When a path contains too many nodes, this will make working with it more difficult. On the other hand, when there aren’t enough of them, you will find that you have a lack of control when you are tweaking the path.
Every left-click adds a node. A long left-click drags out a node’s handle and makes the segment curvy.
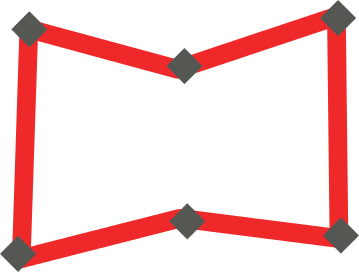
Creating the rough shape with the Pen tool, without thinking too much about any curves. The nodes are represented as grey diamonds.
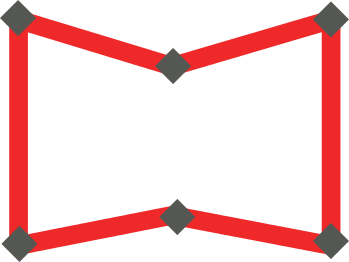
The nodes have been aligned vertically and horizontally using the Align-and-Distribute dialog.

The path has been modified by making the straight segments curved with the help of the node tool.

Some final adjustments have been made, to achieve a nice result. The image now resembles an open book.