Grouping Objects
Grouping
Shift + Ctrl + U or Ctrl + G,
Ungrouping
Shift + Ctrl + G or Ctrl + U,
Grouping allows you to work with multiple objects as a single object: any changes you make will equally affect all members of the group, and the entire group can be copied, duplicated or cloned as a unit. Grouping your objects can help keep your canvas organized; for instance, if you’ve positioned several shapes in a nice even row, grouping them together will make sure that none of them become offset. Groups can also be nested within other groups.
Adding objects to a group
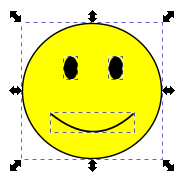
To demonstrate, consider a simple smiley face made of four objects: a big yellow circle, two black ellipses, and a curved line:

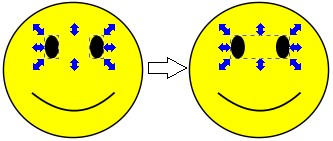
Since we don’t want the eyes to get out of alignment, we should group them. Select both objects and then select Group from the commands bar, menu or keyboard shortcut:

Note that we could also, if we wanted, group all four objects together at the same time. In this example, we’ll make three nested groups: one of the eyes, another of the face (mouth + eye-group), and a third of the whole head (head + face-group):

Now the smiley face can be moved, rotated, and scaled as a single object.
Manipulating objects within a group
When you Enter a group, you gain the ability to select and manipulate its elements freely. To Enter a group you can either:
Double-click on the group
Right-click on it and select from the dropdown menu.
Left-click once on the group and press Ctrl + Enter
Remember that groups can be nested! You may need to Enter multiple levels of groups before you reach the object you’re looking for.
When you’re done editing objects within a group, you need to Exit back out. To Exit a group you can either:
Double-left-click anywhere outside the group
Right-click on the group and select from the dropdown menu.
Left-click once on the group and press Ctrl + Backspace
Note that there is no indicator on the canvas of which group you are “in” at any given time (other than the feedback of which objects you can and cannot select individually). To find that information, look at the status bar or the Objects dialogue ()
Manipulating objects without entering a group
You can select and edit any individual item within a group, without either first entering or ungrouping said group, by holding Ctrl while left-clicking it. Note that this will select an item no matter how many nested groups “deep” it is – for example, in the smiley face up above, Ctrl + clicking on one of the eyes would allow you to move it, even though it’s within a group within a group within a group.
Note that moving or manipulating an item in this way does not remove it from its group – once you release your selection, any further transformations of the group will continue to affect the object as before.
If the object you want to select is “underneath” another object, repeatedly pressing Ctrl + Alt + left click will cycle through ALL objects in that location (high to low in z-order). Having the Object Properties tab open ( Shift + Ctrl + O ) can help to keep track of which object you’ve currently selected.
Removing objects from a group
To remove objects from a group you can either disband the entire group or pull one object out to the next level up.
To disband (“ungroup”) a group, you can either:
Select the group and choose from the menu bar or the Ungroup icon from the commands bar
Right-click on the group and choose from the dropdown menu
Ungrouping returns all objects in the group to the next level up. If you want to extract only a single item while leaving the rest of the group in place, you need to first Enter the group. Then, either:
Select the object you wish to extract and choose from the menu bar
Right-click on the object and choose from the dropdown menu
Note that this will only move the object up one level higher – if you have multiple nested groups, you may need to repeat this process multiple times until the object is extracted to the desired level.