Importing Pictures into a Document
Sometimes, it can be necessary to use raster images in your drawing, be it for copying from a sketch you made, vectorizing a raster image, or for adding a photo into your design. Depending on the purpose, a raster image can be linked to, or embedded. Linking to an image means that Inkscape loads the raster image from the place where it is stored into Inkscape everytime the file is opened. In consequence, if you move or delete the raster image file or the SVG file, or share the file with someone else, the link between those two will break. Instead of the image, you will see a red frame. So it is often safer to embed raster images into the SVG file instead. This will make the file larger, but your drawing will not change due to moving your files around.
To import an image, use . In the dialog that opens, you can select the file.
Then a dialog will ask you if you would like to link or embed the image in question.
Don’t panic if you have selected the wrong option for embedding or linking, you can change this any time. Select the image, right-click on it, and then either select Extract Image or Embed Image, to change to the other mode.
The imported image will be inserted at your mouse cursor’s position, or, if the mouse is not currently on the canvas, into the middle of the visible area of your drawing.
Inkscape imports a huge variety of raster image file formats, but only exports to PNG. There exist extensions for Inkscape that allow to export to JPG and other file formats.
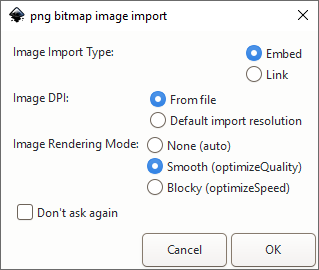
Bitmap Image Import Dialog

When the imported image is only linked in the document, and later moved away, Inkscape will not be able to find the image. A beautiful red frame with a cross will be displayed on the canvas instead!