Strokes
An object’s stroke, its outline, is handled independently from its fill. Two of the tabs of the Fill and Stroke dialog are dedicated to styling strokes.
You can assign a paint to a stroke. This works in the same way as assigning a paint to the fill does (but in the Stroke tab). The stroke paint can not only be a flat color, but also a radial or linear gradient, a pattern or even a gradient mesh.
In the Stroke Style tab, you can set the width of the stroke, the shape of its joins and end caps or select a dash pattern (simple stroke, various dash lengths,…).
Check the zoom level (in %) in the bottom right corner of the window to be sure that you’re applying a suitable width. The more you zoom in, the wider the stroke will appear.
The options for Join and Cap slightly modify the shape of the stroke. The default values are fully sufficient in most cases.
The Dashes dropdown list gives access to a large selection of different dash styles, that give you regular dash patterns along the stroke. The number field to the right allows you to shift the dash pattern to the desired location.
It is impossible to apply blur only to an object’s stroke. The options for Blur and Opacity always apply to the object as a whole.
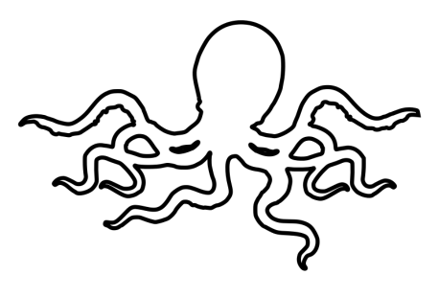
Black flat color on stroke
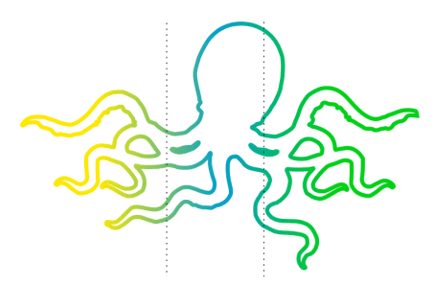
Linear gradient with 3 stops. The dotted lines indicate the spread of the color for each stop.
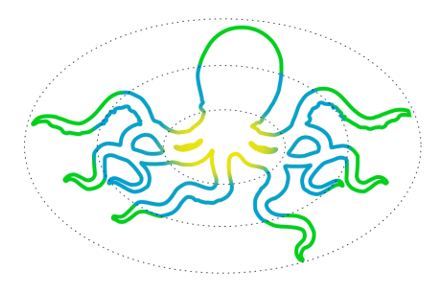
Radial gradient with 5 stops on the stroke. The dotted ellipses indicate the spread of the color for each stop.
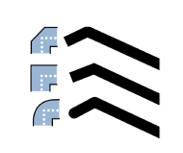
The 3 different types of line joins.